Who thought that rooting an Android device will get so easy with time? One could have never imagined the process of making complex changes in Android by rooting them sitting on your couch at home! What a lot of people have forgotten is that Android is an open-source project. With rooting, you can customize it the way you want. What’s funny is, people consider rooting a hack cracking Android to open up to features. Well, that’s not the case!
Being the open project it is, rooting is a kept-away feature that a lot of people might not need it. But for those who do, here we are with the article for them! SuperSU is an apk that lets your root your Android devices. Before proceeding with the installation process, check out all that you can do with the SuperSU.
SuperSU Details-
SuperSU was an app in the Google Play Store but was taken down for some reason. The apk version has been available for long with multiple versions and updates. With the help of SuperSU, you can permanently root or unroot your Android device. When you root your device, you are superuser as you are open to many features and complicated ROM related operations.
You can flash custom ROM or Kernel with the help of rooting with SuperSU. You can also make your battery last longer than before, after rooting. You can make a lot of changes in the notifications of each app and the way they function in the background or when the app is closed. As flashing and rooting devices require a tool, SuperSU is just one of them that makes those tasks easier. Not just permanently, but you can also unroot your device temporarily with SuperSU, just like switching from dark mode to normal and back!
Install and root using SuperSU-
Step 1-
Download the desired SuperSU version from the link given below.
SuperSU v2.82
SuperSU v2.82 (beta)
Step 2-
Move the SuperSU zip file to the root of your internal memory.
Step 3-
Turn off your phone and boot to recovery mode. You can do this by pressing the Volume Down button + Power button simultaneously (For some devices, it is Volume Up + Power simultaneously).
Step 4-
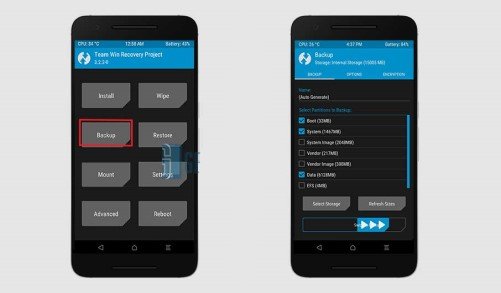
Once your phone is booted to TWRP recovery mode, take back up of current ROM. To do so, click on the Backup button > Select partitions (like data, system, boot). Swipe to take backup.
Step 5-
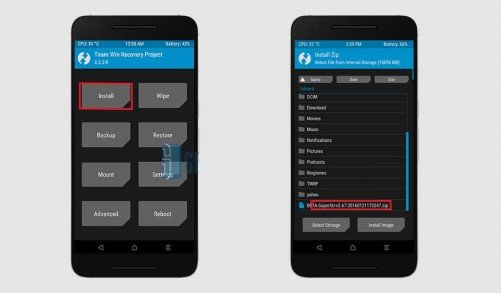
This step is to flash your phone with SuperSU zip. Click the “Install” and locate the zip file. Select the file.
Step 6-
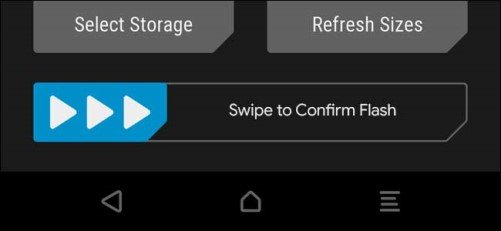
Swipe to confirm flash. Refer to the image given below.
Step 7-
You would have rooted your Android system with Step 6. Now click on the “Reboot system” on your screen.
Step 8-
If you follow all the instructions properly, your Android device has been flashed, rooted and started properly. To confirm the root status, you can download the Root Check app from Play Store.
The process of unrooting is very simple. Open SuperSU app > Settings > Clean-up > Full unroot. Confirm and continue to unroot. Reboot your device and check the status with Root Checker.
Rest assured, stay tuned for more updates and related articles. Also, share this article with all those who think you will enjoy accessing more features by rooting using SuperSU!


