Microsoft recently added a lot of interesting and new features for Windows with the new Build 21286 for the Dev Channel Insider. This build brings a lot of new unseen features in the market including the storage space settings, News and interests on the taskbar, new file system command-line tool DiskUsage, improved time zone experience, and an option to run a Linux command on set up of a WSL distribution. There are a lot of fixes and improvements that are added in the build too.
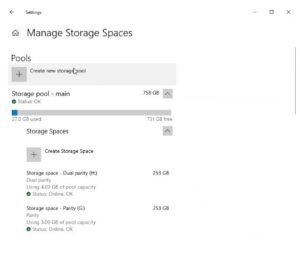
But in this article, we will specifically be talking about one feature out of all, and that is regarding the management of storage space within the Settings. So, as the above sentence suggests, you can now easily manage and create your storage spaces directly from within the Settings application. This basically includes the creating of storage pools and storage spaces of course, also optimizing pools, and it will be a great help in adding and removing disks too. This amazing new feature will provide the users with a new experience, hence providing an accessible, integrated modern experience with different storage features.
How to get started?
So this is a step-by-step process on how to get started with managing your storage space inside the settings and make a storage pool.
- First, go to the settings.
- Now click on the option “System”.
- After that on the left-hand side of the highlighted bar, find the option “Storage” and click on it.
- Now, under the “More storage settings” click on the “Manage Storage Spaces” to get started with your new storage pool.
- Click on “Create new storage pool,” a pop-up will appear, put the tick on available disks, provide a name for your pool and click on “Create”
- Onto the next step, give your storage space a name, specify the storage space it will be acquiring, and click on “Create” again.
- Give a label name to your volume, and select the drive. Now for the last time, click on “Create”.
- Hence, your storage pool is created.
Now Microsoft is rolling out this feature to a division of Insiders at first, in the Dev Channel. This helps them to immediately identify the issues that may try to create a disruption in performance and reliability. Over time, they will gradually become available for all of the users in the Dev Channel. So, keep your calm everybody.


