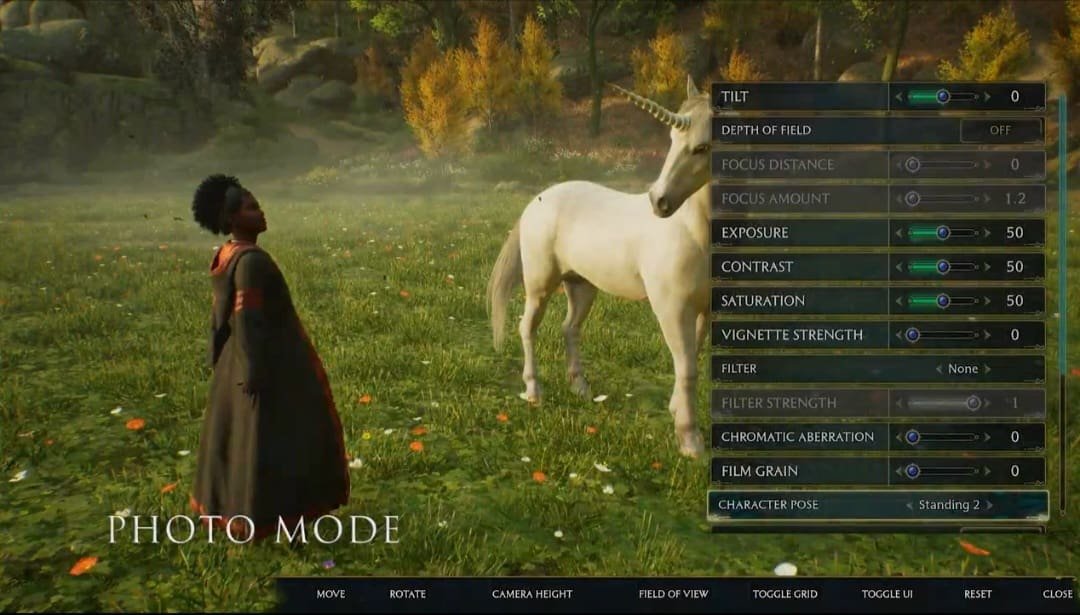
Hogwarts Legacy, the brilliant title from Warner Bros. Games, has perfectly brought Harry Potter fans together for an entirely different experience. A popular title with highly positive reviews, Hogwarts Legacy keeps fans hooked with regular updates along with its stunning gameplay. On June 5th, the developers released the latest patch update, which, along with many other features, brought the super-cool photo mode into the game. This new exciting feature allows players to capture their glorious in-game moments and share those with their friends and family. This feature has gained popular demand over time. Thus, when the developers finally brought this update, fans were essentially elated. But it’s a new feature, and not all players have figured out how to use it. So, we’re offering this guide on how to use the photo mode in Hogwarts Legacy on PC, Xbox, or PlayStation. If you want to know more, keep reading!
If you love to play Hogwarts Legacy, then our guess is you also love the visual elements of the game. Yes, the developers have done a splendid job creating a game with absolutely captivating visuals. To their credit, it all looks stunningly picturesque. And this also means that players often try to capture these moments by saving a snap of their screen. But without a photo mode, this becomes a little difficult. Well, with the new update, you don’t really have to worry about it anymore. Here’s how you can enable the photo mode in Hogwarts Legacy on your PC, Xbox, or PlayStation.
Hogwarts Legacy: How to Use Photo Mode on Xbox, PS & PC?
Bringing up the photo mode in Hogwarts Legacy isn’t really that difficult. But here’s the catch: you can’t unlock photo mode until you’ve completed one particular mission. Yes, you read that right. However, don’t worry much as it’s an early mission and quite easy to complete. We’re talking about the main mission to unlock the Field Guide in the game. That’s about an hour of gameplay if you’re playing it from scratch. Once you’ve unlocked the field guide, here’s how you can use the photo mode in Hogwarts Legacy:
Open the Field Guide Menu
- You need to access the Field Guide menu on your device to use photo mode in the game. If you’re on a PC, pressing the Esc button will do the job for you.
- For Xbox users, this same action can be performed by pressing the Menu button on the controller.
- PlayStation users can do it by pressing the Options button on their controller.
Access the Photo Mode
On this menu, take a peek at the bottom right corner. You’ll find the button that you need to press to open the photo mode here. For PC users, the default key for this is K, while Xbox users can do it by pressing the X button on their controllers. On a PS controller, it is the Square button.
Change the Settings and Capture Your Moment
Once you’ve opened the photo mode, you can literally do anything that you want to capture the photo according to your liking. You can adjust the tilt, depth of field, exposure, contrast, and more picture settings. You can change seasons, change the time of the day, and even change filters. You can adjust the pose of your character like sitting, standing, taunting, etc. In fact, if you don’t like it, you can also remove your character from the screen.
Once you’ve adjusted everything, look at the bottom of your screen and check which button you have to press to toggle the UI. For PC users, this is the Z key on their keyboards. On a PS controller, it is the Square Button. Irrespective of the platform you’re on, you can check your screen to find out the associated button to toggle the UI. Once you press this button, you can remove the menu and all the text from your screen and take the perfect picture as you see fit.
Well, now you know how to use the photo mode in Hogwarts Legacy on PC, Xbox, or PlayStation. Hopefully, you can enjoy capturing snaps of your favorite moments in the game with this feature. If you enjoyed this guide and want to read more such gaming content, keep visiting DigiStatement!


