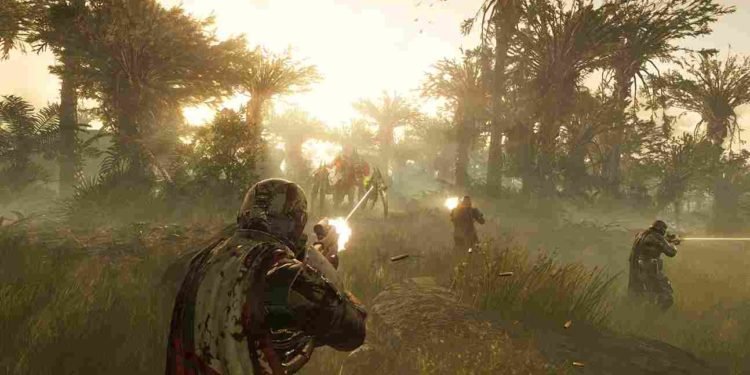
Helldivers 2, the highly anticipated third-person squad-based shooter developed by Arrowhead Game Studios, is keeping players engaged with its intense galactic battles for freedom. However, like any other game, some players have reported encountering launch problems, crashes, and black screen issues on the PC platform. If you have been playing games on a PC for some time, you might already know that these issues are the most common that can plague any game, no matter how old or new. That being said, is there any fix yet? Well, here we are with all the answers.
With the Steam reviews standing at “mixed”, no wonder some players are having a tough time with technical issues. Technical issues, such as launch problems, crashes, and black screen occurrences, may be among the factors influencing these mixed sentiments. Despite this, the quest for a resolution becomes crucial, aiming to provide players with a smoother gaming experience. That being said, let’s get right into the details of what fixes are available to try and resolve the issue.
Helldivers 2 Not Launching, Crashing, Black Screen Issues on PC: Is there any fix yet
Regrettably, at the time of writing, there is no official fix provided by the developers for the launch problems, crashes, and black screen issues encountered by some Helldivers 2 players on PC. However, given that these issues are not entirely new, the community has devised a range of potential workarounds. Just keep in mind that these workarounds are not guaranteed fixes. Anyway, here are those potential fixes.
Restart Steam and PC
Before taking any drastic measures, try restarting Steam and your PC. This simple step often helps refresh system processes and may resolve any temporary issues causing the game to malfunction.
Run as administrator/Compatibility mode
Running the game as an administrator and in compatibility mode ensures that the game has the necessary permissions and can interface correctly with the operating system. To do this, navigate to the game installation folder, right-click on the game executable, and choose “Run as administrator”. Here, you can also set Compatibility Mode for an older Windows version. After this, make sure that you run Steam as admin too.
Install Visual C++ files
Installing or repairing the Visual C++ Redistributable files ensures that the game has the required runtime components for smooth execution.
- Download the necessary Visual C++ files from Microsoft’s official website.
- Install both the x86 and x64 versions.
Disable overlays
Disabling overlays in Steam, Discord, and other third-party applications removes potential conflicts that might interfere with the game. Also, ensure that you have disabled overclocking apps and other peripheral-related software, as they can be the ones causing this issue.
Crossplay and graphics settings
Adjusting in-game settings, such as disabling crossplay, switching to windowed mode, and lowering graphics settings, can alleviate performance issues on certain systems. So, from the in-game options, make sure to disable cross-play and lower the in-game graphics settings if the game launches.
Disconnect additional peripherals
If you are someone with a lot of extra peripherals connected, disconnecting extra peripherals and disabling software like Razer Synapse, and MSI Dragon Center could potentially resolve the launching, crashing, and black screen issues.
Reinstall Anticheat
You can also try reinstalling the anti-cheat software (nProtect GameGuard) to ensure that it is properly installed and functioning, addressing potential issues with game security. To do this, head to the game installation folder and then to the “tools” folder. Here you will have to run the “GGuninst” .exe file as an administrator, which will uninstall the anti-cheat program. After this, reinstall GameGuard by running the setup file and then launch the game.
Disable DLC Content
Temporarily disabling downloadable content (DLC) through Steam may help identify if specific add-ons are causing the problem. So, in the Steam library, right-click the game, select “Properties”, and go to the DLC tab. Finally, uncheck any enabled DLC and then launch the game.
Verify game files
Verifying game files through Steam checks for and corrects any corrupted or missing game files, ensuring the game’s integrity. In the game’s properties on Steam, go to the “Installed Files” tab. Click “Verify Integrity of Game Files.” Wait for the process to finish and then launch the game.
Update and run on a dedicated GPU
Outdated drivers can sometimes lead to various issues, including crashing, not launching, and black screen. Head to the official website of your GPU manufacturer (Nvidia or AMD) and look for the GPU model you use. If an update is available, download it and install it. With your GPU drivers up to date, type “Graphics” in the Windows search box to open the Graphics Settings menu, and from the list of installed programs that appear, select the game and set it to “High Performance”.
Whitelist the Game from Antivirus
Ensuring that the game is allowed through antivirus and the Windows firewall prevents it from getting blocked or interfered with. So, go ahead and add the game’s executable file to the exceptions list of your antivirus program and Windows Firewall.
Launch options (-dx11, -dx12)
Trying different DirectX versions through launch options can help troubleshoot compatibility issues with the game engine. To use different launch options, go to the game’s properties in Steam and head to the General Tab. Here, under the launch options textbox, try using “-dx11” or “-dx12” commands one by one to launch the game.
Rename/Delete save game files
Renaming or deleting save game files might resolve issues related to corrupted or problematic save data, though this action results in the loss of game progress. You can find the saved file for Helldivers 2 at the following location: C:\Users\(username)\AppData\Roaming\Arrowhead\Helldivers
Increase Virtual Memory
Adjusting virtual memory settings to 1.5 times the total RAM for the initial size and 3 times the total RAM for the maximum size can alleviate memory-related issues during gameplay that might be causing crashes. If this is your first time increasing VRAM, all you have to do is:
- Search for “View Advanced System Settings” in the Windows search box.
- Click “Settings” under the Advanced tab.
- In the Performance Options window, navigate to the Advanced tab once more.
- Click “Change” under the Virtual memory section.
- Uncheck the option that says “Automatically manage paging file size for all drives”.
- Now, select the drive where the game is installed (e.g., C or D) and set the custom size for virtual memory as mentioned above.
Update Windows and BIOS
Keeping Windows and BIOS up to date makes sure that the operating system has the latest bug fixes and improvements that might impact the game’s performance. So, ensure that both your Windows version and BIOS are updated.
Reinstall the game
If none of the above-mentioned fixes do the trick for you, consider completely removing the game, deleting associated files, restarting the PC, and reinstalling the game on a faster drive, preferably an SSD.
Well, these are some workarounds that you can try for now. We hope this was helpful. Now, before you leave, don’t forget to stay tuned to DigiStatement for more guides and news like this on all the latest gaming trends. Read more: Helldivers 2 Save File Location: Where is it


