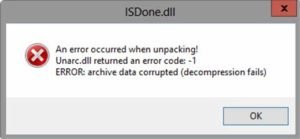
The library files such as “Isdone.dll” and “unarc.dll” or “not found” errors have been arising a lot nowadays. The error “Isdone.dll” is basically a library file active link – it has a purpose that is handled by the system to perform various tasks. The PC is going to require “Dynamic Link Library (DLL)” files in order to make daily basis tasks, and they get applied in a virtual database known as “The Registry”. Typically such errors come in front while people want to install the pre-downloaded games or applications and many other things. And such errors usually occur for a video game and software or an application that needed some kind of heavy graphics or animations. This is the reason, that you see this error “ISDone.dll is missing” message getting popped up on the screen after the installation of the game or software gets canceled.
Now, this post is not just about downloading isdone.dll or unarc.dll, but also how to get rid of these fix dll missing errors from your computer.
Now before going into the fixing segment, first let’s go through the below points that you must keep in mind before installing the software or a game:
- Check the system requirements for the application that you’re trying to install.
- See for some latest updates of that particular software, if there are any? Try installing that.
- Check your system type and also the software’s compatibility, i.e. 32-bit or 64-bit.
- Is there a third-party antivirus installed on your system? That can create a nuisance too.
Once all the above points are in check, and still, the problem persists. Well, don’t worry let’s move ahead to look at the three techniques and figure out how to fix them.
Technique 1: Use the Windows memory diagnostic tool.
- Click on the Start button.
- Then, move to Control Panel.
- Open the Administrator Tools.
- Then select by double-clicking on ‘Windows Memory Diagnostic’.
- It will ask you to reboot your system now or later, but make sure to save any unsaved data/file.
- Once the restart is done, there is a chance that your issue should be resolved after the reboot.
Technique 2: Performing a clean boot.
- Open the ‘Run’ command.
- Type ‘MSConfig’ there and press the enter key.
- The window ‘System Configuration’ will pop-up and display on your screen.
- The go-to ‘Service tab’.
- Click on the box saying ‘Hide all Microsoft services’ placed at the bottom.
- Click on the ‘Disable All’ option on the right side.
- Once everything’s done, go to the ‘Start’ tab.
- Open Task Manager.
- Now right-click on the checklist under the tab ‘Startup’ and then click on the ‘Disabled’ option.
- Close Task Manager.
- Now select ‘OK’ that will be displayed on the “System Configuration” window.
- It will ask to restart the system.
- Restart it.
- Once the reboot is done, check again and see whether the issue is resolved or not.
Technique 3: User compatibility mode
- Right-click on the executable application or file.
- Now select the ‘Properties’ option.
- Go to the ‘Compatibility’ tab.
- Click once on the checkbox named ‘Run this program in compatibility mode for’ option.
- Select the ‘Windows 7’ option from all the listed items.
- Now select another checkbox saying ‘Run this program as an administrator’ right at the last.
- Click on the ‘Apply’ option and then press ‘OK’, and run the file now.


