The Legend of Zelda has been a classic in the gaming industry for decades. The newest addition to the series has made its way to the top of the list in no time. Developed and published by Nintendo, The Legend of Zelda: Tears of the Kingdom has gained its rightfully deserved hype in the gaming community. The game allows players to explore the magical open world of Hyrule and experience the nostalgia of ‘Breath in the Wild’. The sequel carries some of the items from its predecessor, such as the Climber’s Gear. However, along with the map, the locations of the gear have also changed. In this article, we will be talking about the location of the Climbing Gear Armor set and where to get and find it in The Legend of Zelda Tears of the Kingdom, so stay tuned!
Players can equip various items to keep in their inventory and use them to help with their missions. The Climbing Gear Armor set is one of those that players can find in the game. This gear is well known for the abilities it offers, and the look of it also appeals to many. Though, locating this essential armor set can get frustrating. But don’t worry, we created this detailed guide for you to learn about the armor’s benefits and also where to get it, so keep reading!
Zelda Tears of the Kingdom (ToTK) Climbing Gear Armor Set Location: Where to Get & Find
ToTK has a lot to offer, including various armor to benefit players in many ways. One of which is the Climbing Gear Armor that provides Link with great climbing speed. The game requires players to climb many walls in order to complete missions and explore all parts of the Hyrule world. This is where the armor comes in! Offering great climbing speed and excellent grip, the armor set consists of three pieces, including the Bandanna, Boots, and, the Gear. The Climber’s Bandanna is no ordinary bandanna, it is said to be infused with ancient technology that provides great core strength to the wearer. The boots, on the other hand, provide a no-slip toes technology for the wearer to walk on difficult surfaces with ease. Lastly, the Gear is equipped with a vest and gloves, where the gloves also provide an anti-slip benefit to the wearer, allowing them to climb mountains and walls without any worries.
Well, these three pieces of the Climbing Gear armor set are located in three different locations on the map. Players will need to head to these locations and explore to collect the pieces and add them to the inventory.
Climbing Gear
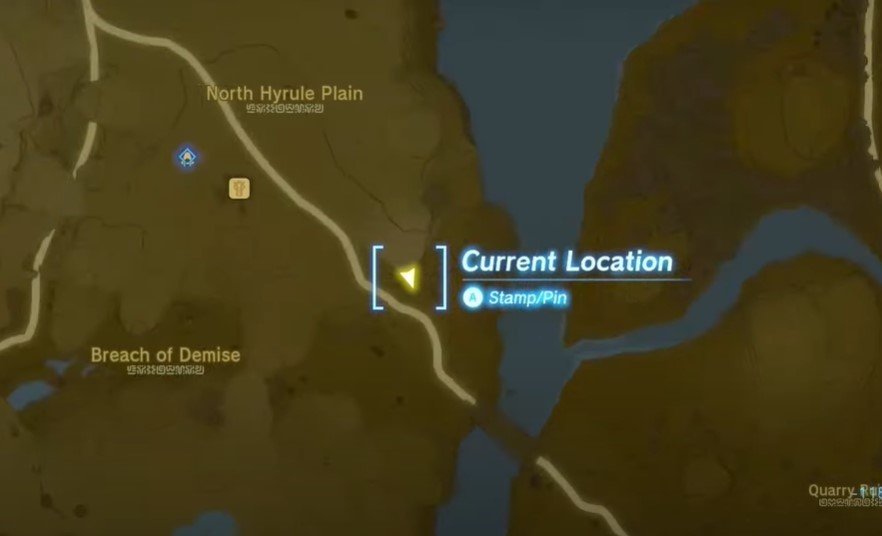
Climbing Gear is the main part of the armor set, which comes with a pair of no-slip gloves and is located in the North Hyrule Plain Cave. The map shows two entrances to the cave, and you can choose either, but we suggest taking the route furthest from the North Hyrule Plain. The location can be accessed via the following coordinates: -1182, 0631, 0069. Once you reach the location, enter the cave into the water stream you see. You will immediately have to pick a fight with two Like Likes or you can choose to avoid them, but that seems difficult to pull off. The easiest way to win against them is to not take a direct fight and dodge their attacks until you see a glowing ball-like structure. That’s their weak spot; hit it repeatedly to inflict as much damage as you can. If they spit rocks at you, just use ‘Recall’ to throw it back at them, or just dodge!
As soon as you defeat them, you’ll see the wall you need to climb. Climb straight up until you see the start of the waterfall. Here, you’ll be greeted by a Horriblin guarding the entrance. You can take it down by simply using your bow. After this, walk up to the right side of the waterfall until you reach the top. Glide and swim your way inside the waterfall that’s on the top. You’ll see Brightcaps all around, collect them for later and walk up to the shrine-like place. You’ll see a chest in the middle of it; open it to collect your Climbing Gear!
Note: If you wish to access the North Hyrule Plain Cave via another route, head to these coordinates: -1233, 0767, 0099.
Climber’s Bandanna
The Climber’s Bandanna is the headgear of the armor set. It is located in the Ploymus Mountain Cave, which falls east of Zora’s Domain. The cave is located south of Lulu Lake, which will make it easier to spot. The coordinates of the place are 3583, 0533, 0275. You will need to make your way into the cave, which is located near the waterfall. Once you enter the cave, you will need to climb the surface you see above, next to the cave walls. Climb the surfaces one by one by jumping and gliding onto the next, and so on until you reach the top. Be sure not to get wet, as that will result in slipping as you climb. If you do get wet because of the rain or water dripping from the cave, just build a campfire if you’re equipped with the materials and dry off Link’s clothes before the next climb. Upon reaching the high ground, you’ll see an open passage you need to go through. There will be a shrine-like place with a chest in the middle. Open the chest to collect your Climber’s Bandanna!
Climbing Boots
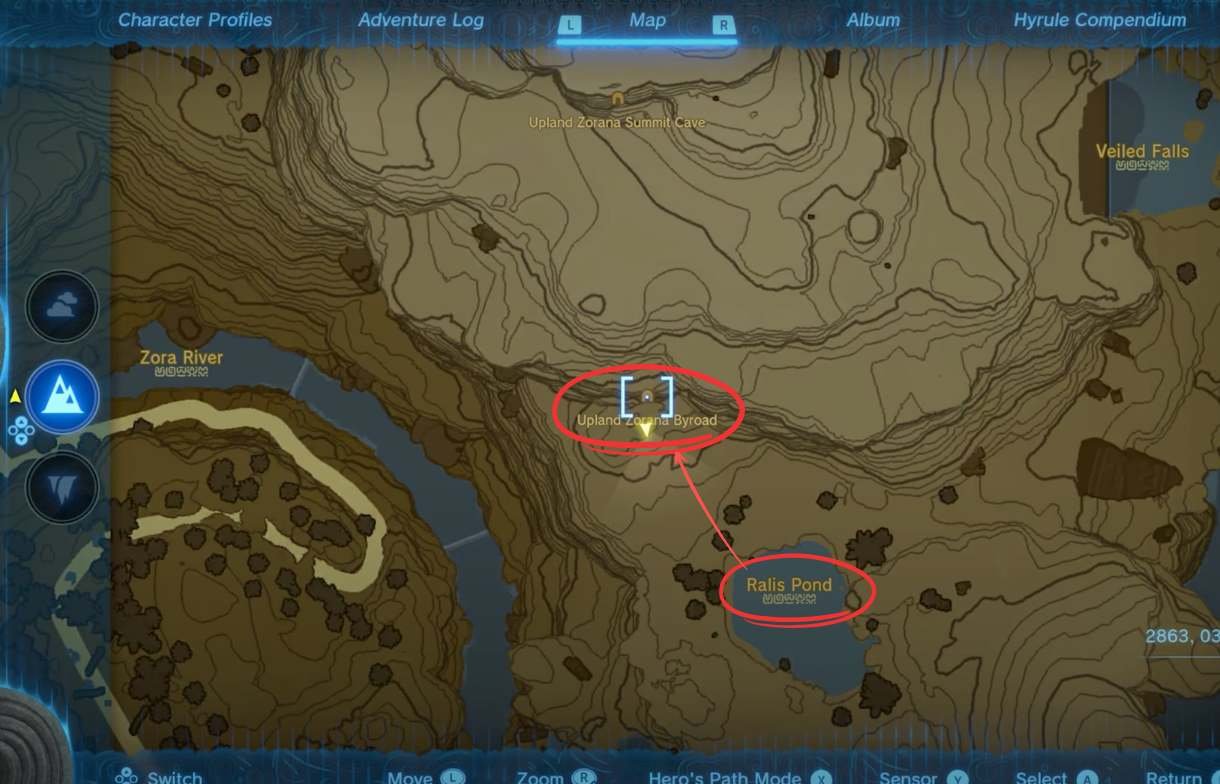
The last and most essential piece of the Climbing Gear armor set is the Climbing Boots. The boots are located inside the Upland Zorana Byroad, west of the Zora’s Domain, east of the Zora River, and north of Ralis Pond. The coordinates of the place are 2863, 0331, 0230. Once you enter the cave, you’ll stumble upon two paths. You should head towards the one on the right in order to get the Climbing Boots. Walk down the steps into an entrance that will be blocked by vines. You can easily cut them with your sword or any other sharp object. Upon entering, you’ll see statues inside and what seem to be the ruins of a place. You can either swim past it or hop through the ruins. Once you reach the end, you’ll see a door, which you can lift up using Link’s ‘Ultrahand’ ability. Lifting the door will empty all the water trapped inside, which had submerged the statues. Besides the door you just lifted, there is another entrance where the treasure is located. Make your way to this entrance, head to the shrine-like place, open the chest in the middle, and collect your Climbing Boots!
This brings us to the end of the guide, and we hope the information provided above proved to be helpful. Before leaving, make sure to check out DigiStatement for more information and updates about your favorite games!


